You are interested in natural gardening and have already heard of the term permaculture?
With a permaculture garden you are able to live self-sufficiently and get the best out of it for nature, people and animals.
Permaculture lives on the principle of complete and permanent coverage of the valuable soil, the appropriate growth of the plant, soil health, balance and health of nature in interaction with humans and animals.
You would like to live these aspects, then start today: create your own permaculture garden and become part of the total biotope! What you should consider step by step, you will learn here:
1. soil, soil, soil
You can create your permaculture garden on any soil surface. Once you have chosen the locations for the planting areas, you can start preparing them. This is because the soil must be fertile to create growth, and fertility can be created where it does not exist. So you can turn a drab lawn into a living permaculture bed. This takes very little patience. We chose a clearing in our woodland garden to become a vegetable patch before spring. However, quite a few Jerusalem artichoke plants had been growing there for years, and they hid their tubers firmly in the ground even in winter. It is not so easy to scare away this dominant plant there. It was allowed to continue growing in another place, however, we considered this location ideal for a vegetable belt.
What was there before, whether lawn, rampant plant, or whatever, it must go to prepare the soil for the new plants as well as to not directly displace them.
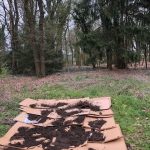
Step 1: Line the ground with cardboard!
Preferably slightly thicker cardboard, with as little writing as possible and no glue residue. The bottom should be completely covered, so that the unwanted plants from below do not come to the light via detours. The cardboard also has the positive effect that earthworms enjoy it and lay their eggs there. And earthworms are extremely important for the soil, especially for loosening. If you haven’t collected a large amount of large pieces of cardboard, ask around at stores that sell large items, such as bicycles or televisions. They are usually happy to get rid of the cardboard.
Step 2: Now on top of the cardboard sprinkle good soil.
A nice thick layer of 10-15 cm. Enrich with compost, and finally sprinkle a little sandy soil, ready.
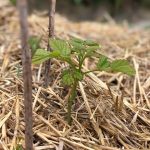
Step 3: Sowing or planting.
Be careful: go for mixed crops!
Now plant soil conditioners at the edge of the bed or in an adjacent belt (e.g. lupines or comfrey) and observe the growth during the first weeks and remove some weeds. As long as the plant has enough space to grow and the emerging weeds are not too dominant, you can leave them and observe them as well. In this way, you can give completely natural mixed cultures room to develop. After all, the goal is to keep the soil permanently covered, and by letting it grow in a controlled manner, this can be made possible. Alternatively, you can use layers of mulch, especially in the colder months. These can be any of straw, wood chips or a dried layer of lawn clippings, there are many types of mulching. The most important thing remains to protect the soil from sunlight, keep moisture in the soil and keep weeds out. A layer of mulch can also be used to somewhat delay the early blooming of fruit trees when a frost period is imminent. In doing so, the layer of mulch around the tree trunk keeps the cold in the soil and the tree does not yet begin to produce its flowers. Once the frost is over, the mulch layer can be removed again, or left in place, depending on your preference, it will not harm the tree.
Step 4: Avoid monocultures!
It harms the soil. Plan your beds and determine what planting sequences you want to establish in the beds where you want to harvest. Create variety and diversity and make sure the plants get along with each other in the planting sequence!
Enrich the soil with natural fertilizer to make it hardy and persistent. Especially from our own long experience, we recommend the use of microorganisms. In doing so, various bacteria strengthen the plants and improve the soil. Nature could not do it better, and the good thing is that it is pure nature, because it accelerates and activates the natural processes. You can use this kind of fertilizer at any time, again and again, there can be no overfertilization, the varieties remain pure and strong.
Of course, you can also create your own fertilizer by preparing good compost, making your own slurry or other. There are many ways in which you can give your plants a little help. You can also add all our suggestions to each other, with purely natural aids you are completely free. You will see that your plants become more resistant to diseases and pests or survive them faster. So when you take care of your plants, you should always keep an eye on the soil as well. In between crop rotations, the soil may also receive some support, and the aforementioned tools, such as microorganisms, are appropriate there as well. If you keep an eye on the soil, it will be able to improve steadily over the years to provide an ideal location for the plant growing there. Don’t force plants to grow in a specific location! Every site, every soil type, provides the ideal place for very specific plants. Give nature a little time and you’ll see that plants you wouldn’t expect to find there will take root all by themselves.
2. mixed cultures – who can with whom?
Before you plant your bed or areas in the garden, you should think carefully about what should grow where. Knowing good and bad neighbors will help you do this, especially in the vegetable bed. In the perennial or shrub belt, this comes naturally because the plants develop as they can and you quickly figure out what can or can’t do well with each other or with certain locations. This results in no crop failure and the planting areas usually recover and regulate themselves within a season. So take a look especially at the mixed cultures in permaculture vegetable cultivation.
3. Zones
Before breaking ground, divide your garden into zones. To do this, you need to take a close look at the location of your garden. Where is the south side? This can be used well for vegetable beds.
Where is the north side? There should rather grow shade-loving plants.
Where does the wind usually come from, are there times when cold easterly winds occur? There, consider whether a windbreak provided by an insensitive hedge can help keep the cold wind out. Hawthorn, for example, provides ideal protection and enhancement to your natural garden.
Can the wall of the house be used? If so, give some thought to climbing plants. There are many that grow differently, need climbing aids (vines) or even climb themselves (wild vines or ivy), but the location of the house wall should also be considered. Overgrown house walls should be kept in check so that they do not destroy the gutters or even the roof. With a little care once or twice a year, they turn out to be true habitats and sea of flowers for bees and beetles, for example.
Are there protected sun traps? These could include beds that provide an ideal location for cold-sensitive plants.
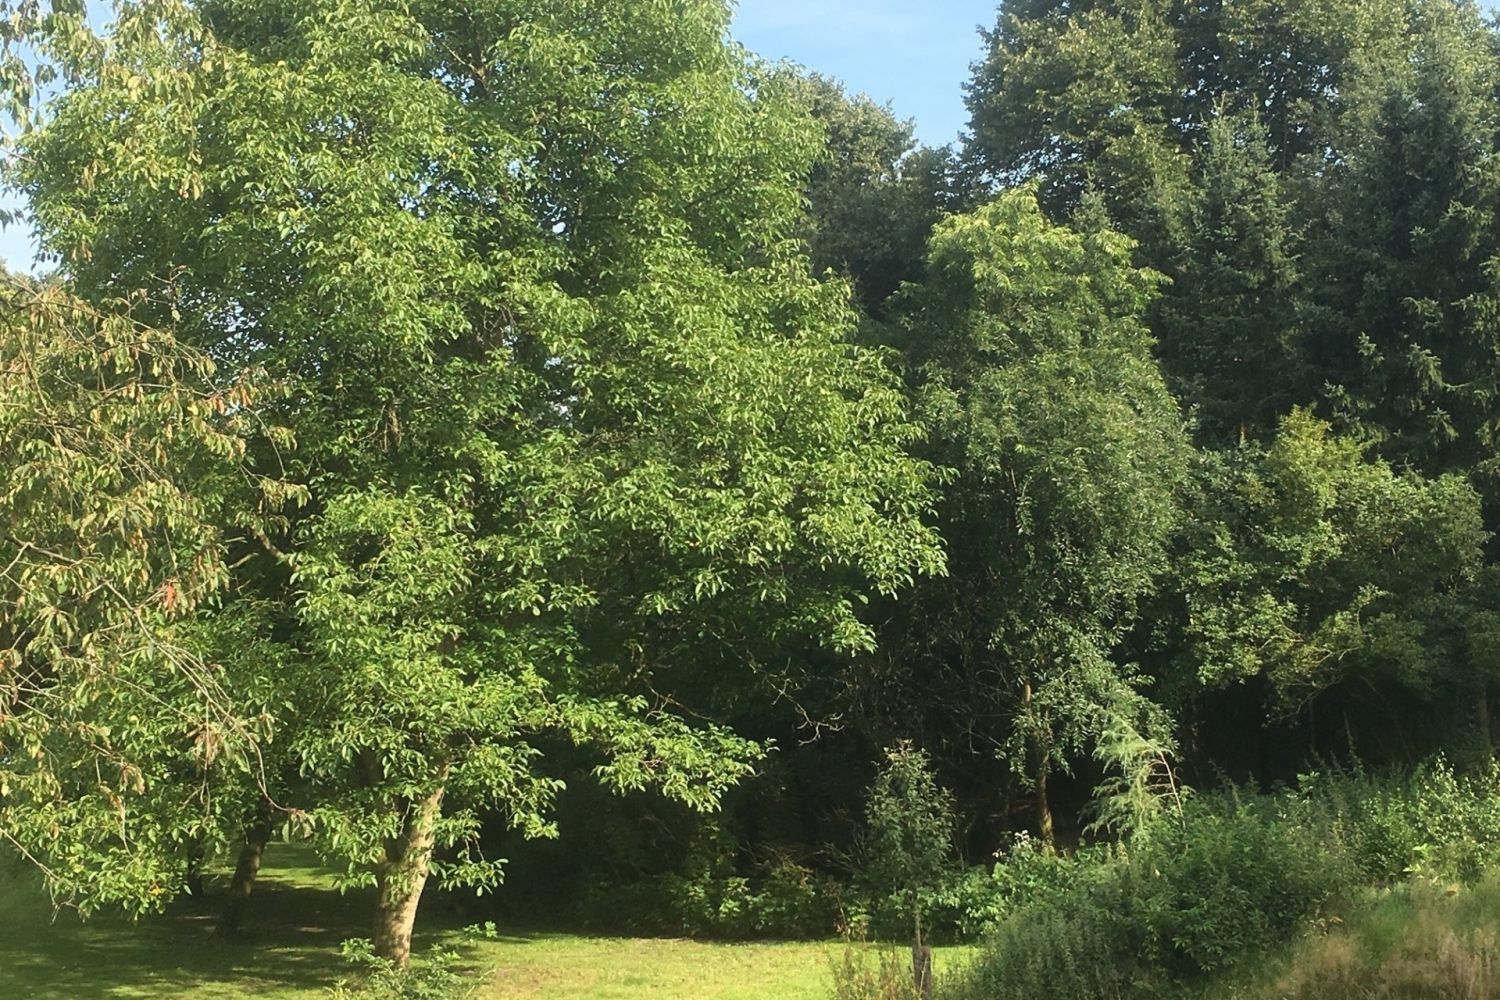
Are there already areas with an older stand of trees? This could be used as a woodland garden!
Are there areas with natural stones? These warm up from exposure to the sun and raise the ambient temperature a few degrees.
Can you build a small pond? This is a habitat for wildlife, watering hole for insects, and improves the climate in the area.
Are there mounded areas? Natural raised beds are suitable here.
Do you have the opportunity to keep bees? Do your part to preserve biodiversity and provide a habitat for honey bees (wild bees are welcome too). They are great helpers in pollinating flowers, so they help with self-sufficiency twice: with honey and preparing the fruit harvest.
Set up a place for a compost pile. There you can compost tree trimmings, lawn clippings and other garden and organic “waste" that you can use next year for your garden beds. The size should be adapted to the size of the garden.
Is there enough space for a greenhouse? This can be used for growing and for delicate plants like tomatoes. However, this should not be located too far from the house, as you often have to walk there, especially when raising young plants.
Is there a possibility to keep chickens? They provide eggs and can regularly keep the beds clean. Chickens are the ideal animals for a sustainable life with nature, animals and people.
If you can build the chicken coop right next to the greenhouse, you get the added benefit of keeping the temperature of the greenhouse high through the warmth of the chickens, allowing you to use the greenhouse as an orangery, for example. In this way, sensitive plants can be overwintered and further yields can be created.
Pay attention to the paths! Zones that are particularly far from your home should tend to contain fewer plants that need regular care or harvesting. Kitchen herbs should also be within reach. Woodland zone, orchard and shrub belt may function more framing. A centered location of the house is ideal, however, in reality, yes you can’t move your house and have to plan with what you have. As the top 2 rules, consider your walkways and sun exposure!
Do you have only a very small area for your design? Just set up the zones in miniature, it works on a small scale as well as a large scale. This way you can use a single tree to fulfill multiple zones. Mulch the tree disc under the crown or use soil conditioners and cover crops like postelein or chickweed. Then a 1-1.5m wide perennial belt of nettles, comfrey, lupine, dandelion or pickerelweed. The outer circle is then formed by bush areas farthest from the sunlight of hawthorn, elderberry, currant, rosehip or hazelnut, and in the sunny area then the vegetable, flower and herb beds. Thus, in the smallest space can be created an inherently functioning biotope sustainable gardening. This miniature biotope can provide self-sufficiency and habitat for humans and animals at the same time.